Appearance
Geo-fencing
A common use-case for companies is to create location-specific experiences. For example, companies that need to comply with sanctions laws may want to block or redirect traffic from sanctioned countries.
A typical approach is to create firewall rules at the edge. Unfortunately, this doesn't always work since users can use VPNs or proxies to spoof their location.
Instead, you could augment this approach with Honeypot's geofencing capabilities. Honeypot's deployment model allows it to detect inconsistent VPN usage and understand a user's actual location to automatically redirect high risk traffic.
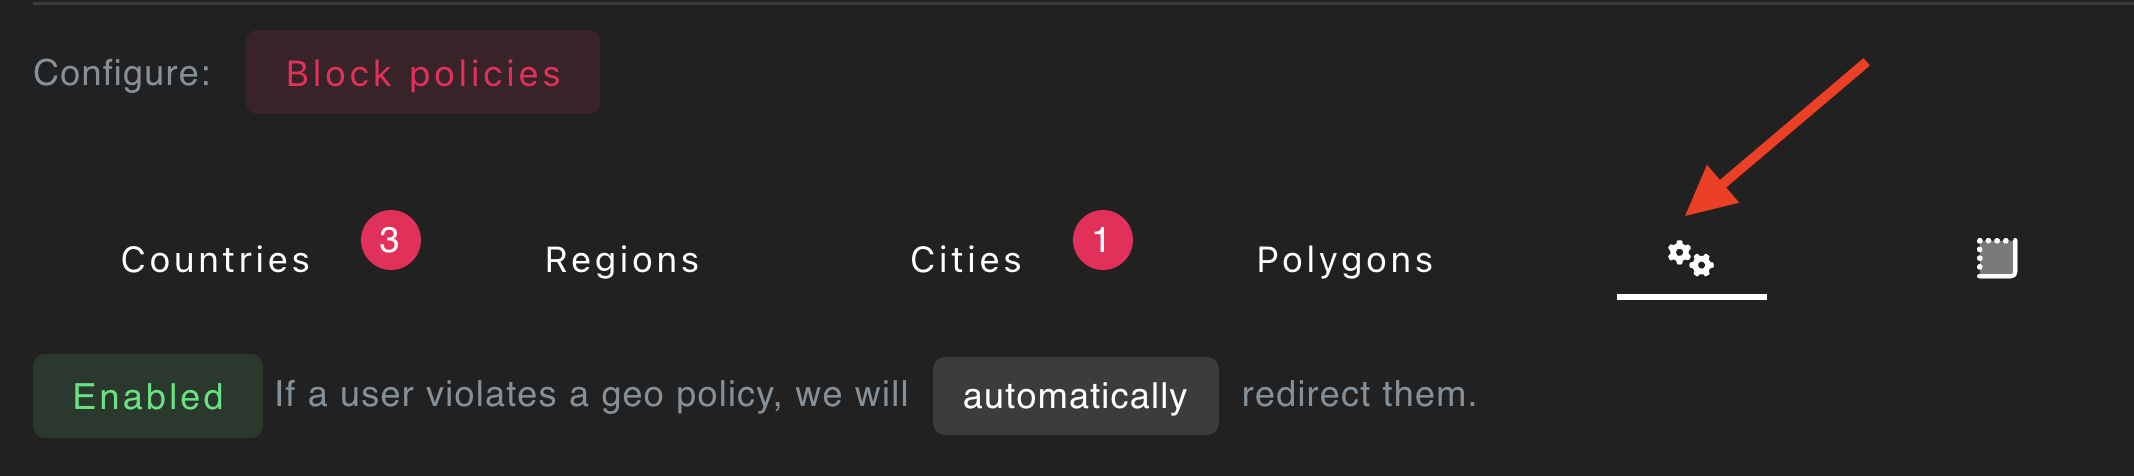
The sections below show you how to automatically or manually redirect traffic based on a user's geo location.
Auto redirect
- Create a
litehoneypot from the UI - Go to
Geo Policiestab
- Select the countries, regions, and cities you want to redirect
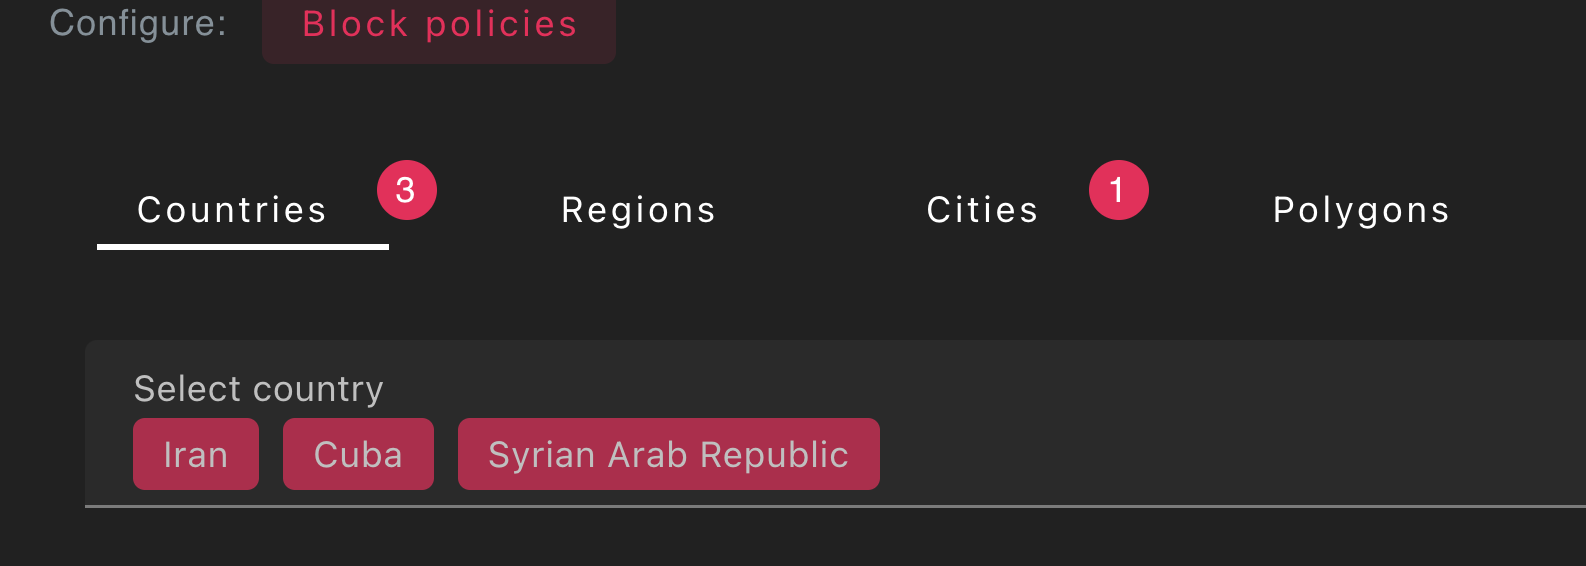
- Turn on auto geo-blocking.
Manual geoblocking
- Create a
litehoneypot from the UI - Go to
Geo Policiestab - Select the countries, regions, and cities you want to redirect
- Turn off auto geo-blocking

- Call the
honeypot.geofence()method from your front-end code
js
// Optionally identify the user *before* geoblocking them
honeypot.identify('user1234');

// this will automatically redirect if they match one of the locations
// in your geo policy
honeypot.geofence();
GeoCaptcha
Honeypot's default geolocation signals come from passive analysis of the user's network. This approach provides the least friction for users and has an estimated accuracy of 99.8% at the country level. While these signals are effective for most use cases, there are alternative ways to gather user location data via Honeypot.
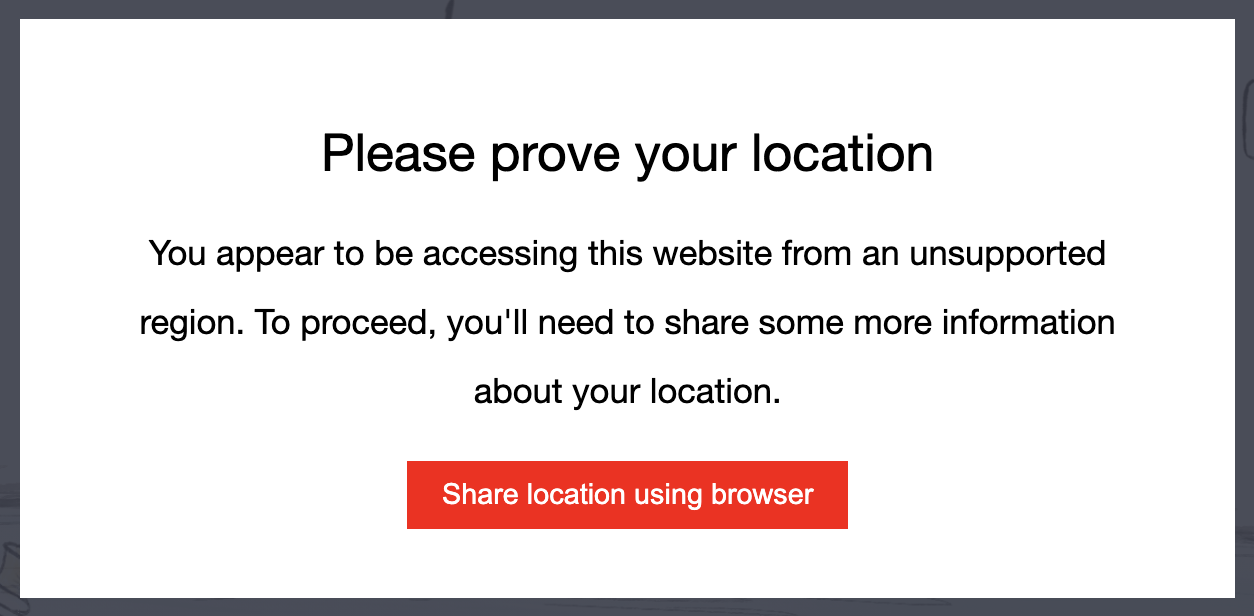
GeoCaptchas provide additional location signals at the expense of increased user friction. When a GeoCaptcha is presented to the user, they will see a popup that allows them to prove they are not violating your geo policies. Here is an example of how the GeoCaptcha appears to users.
TIP
The text and style of the popup are customizable from the Honeypot UI.
Due to slightly increased user friction, we recommend deploying GeoCaptcha strategically for key workflows. The additional location signals provided by GeoCaptcha are particularly useful for the following use cases:
GeoCaptcha Use Cases
Automated Appeals Process: When users are geofenced, you can present a GeoCaptcha that allows them to share additional location data to prove they don't violate your geo policies. This creates a self-service appeals process that:
- Reduces manual review workload
- Provides immediate resolution for legitimate users
- Maintains security while improving user experience
- Automatically validates location claims through browser APIs
High-Stakes Transactions: For critical operations like:
- Large financial transactions
- Account changes
- Sensitive data access
- Administrative actions
Regulatory Compliance: When you need to meet specific geographic requirements for:
- Data residency laws
- Financial regulations
- Industry-specific compliance
- Audit requirements
GeoCaptcha Configuration
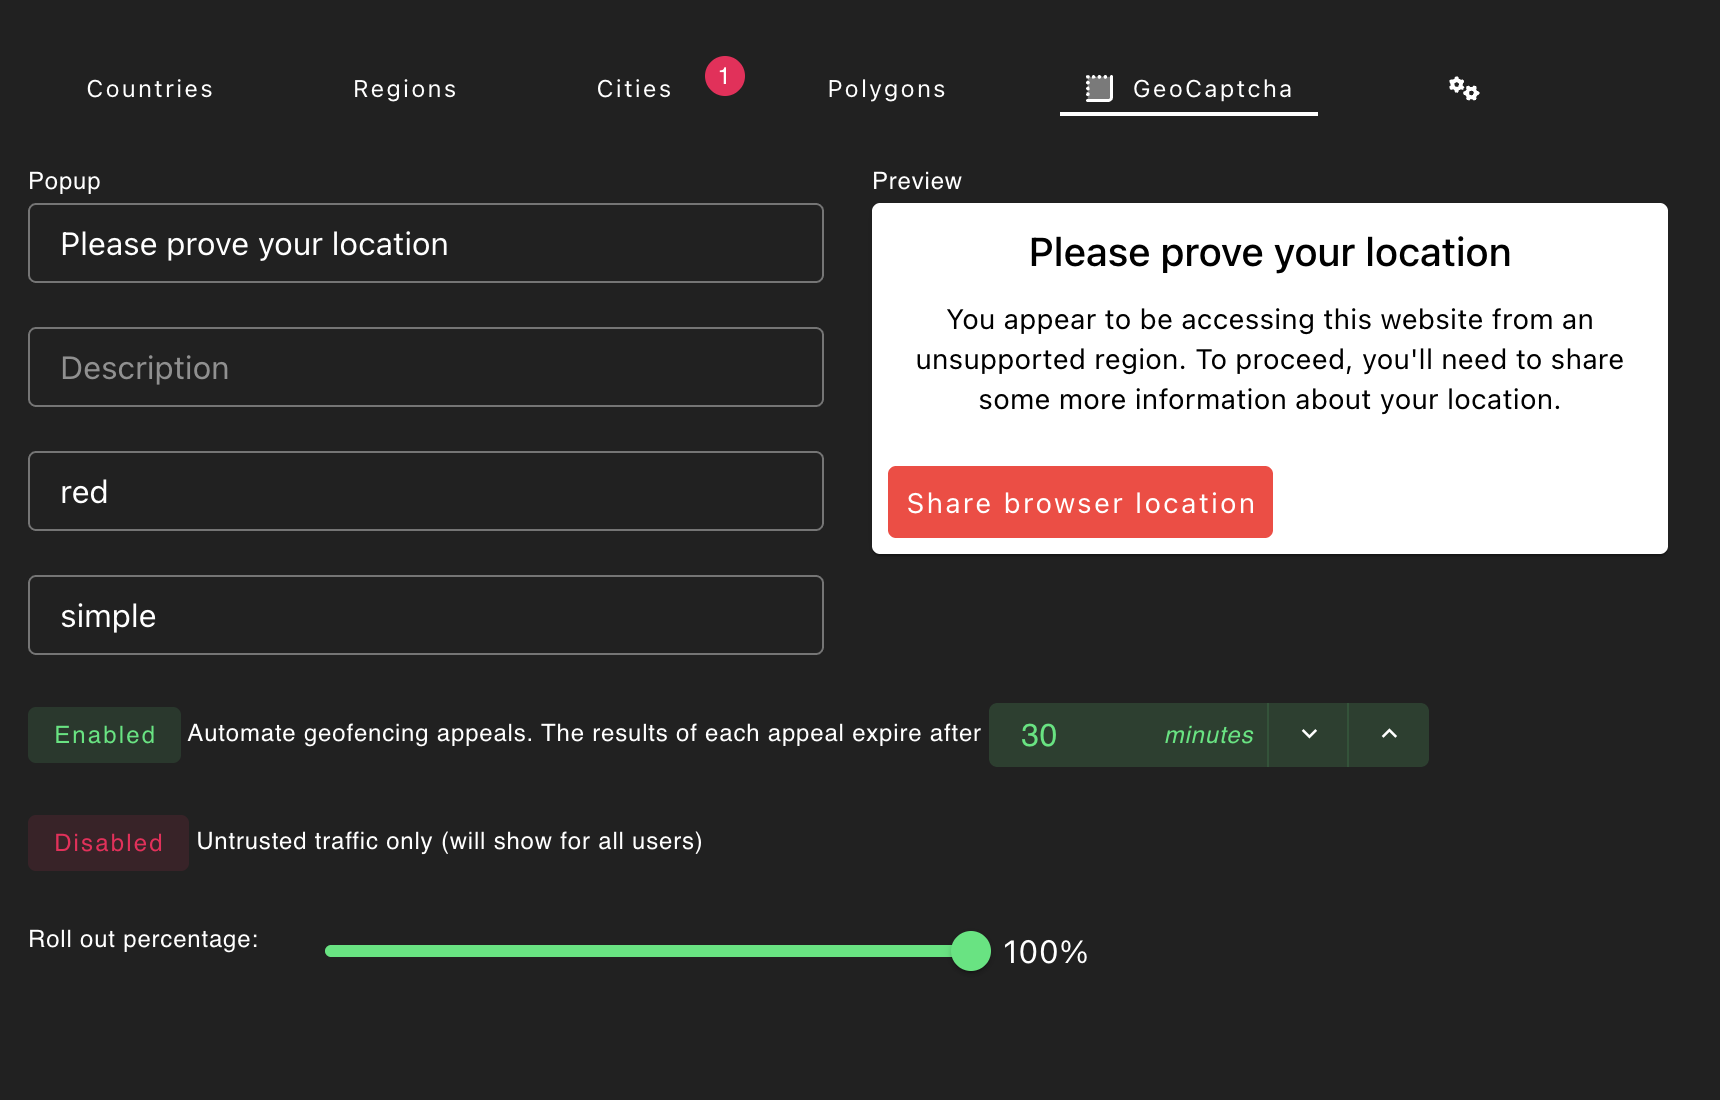
GeoCaptchas can be configured in multiple ways. You can update the styling, and also the logic for when they trigger, from the UI. To do configure and enable GeoCaptcha on your account:
- Navigate to Configure → Honeypots → Geo Policies → GeoCaptcha
- Set your custom title and message
- Configure when the GeoCaptcha should be triggered. See the Usage section below.
Usage
You can either manually or automatically invoke a GeoCaptcha.
Automatically Invoking GeoCaptcha
To automatically allow users to appeal the results of a geo policy violation, make sure Automate geofence appeals is in the Honeypot UI.
Once enabled, if a user violates a geo policy, they will be presented with a popup GeoCaptcha challenge. If the user chooses to grant permission and the new location reading proves they do not violate your geo policies, they will be allowed on your platform without any additional work from your support team.
Manually Invoking GeoCaptcha
To manually show GeoCaptchas during key workflows, make sure Automate geofence appeals is in the UI.
Next, call the geoCaptcha() method on your Honeypot instance:
js
const result = await honeypot.geoCaptcha();The GeoCaptcha response includes two location readings (p1, p2) that are more accurate than network-based geolocation:
json
{
  "event_properties": {
    "p1": {
      "latitude": 34.11071814891187,
      "longitude": -84.11076872392265,
      "accuracy": 40,
      "altitude": 307.93707275390625,
      "altitudeAccuracy": 29.47065544128418,
      "heading": null,
      "speed": null
    },
    "p2": {
      "latitude": 34.11071814891187,
      "longitude": -84.11076872392265,
      "accuracy": 40,
      "altitude": 307.93707275390625,
      "altitudeAccuracy": 29.47065544128418,
      "heading": null,
      "speed": null
    }
  }
}
Best Practices
- Use sparingly: Since GeoCaptcha introduces user friction, it is designed for critical workflows, not every interaction
- Clear communication: Ensure the configured popup text explains why you need location data and how it will be used.
- Fallback handling: Have a process for users who decline location sharing
- Privacy compliance: Ensure your use case complies with relevant privacy regulations. If you are using this data for purposes other than compliance or security, we recommend leveraging the privacy signals included in Honeypot.
- Performance consideration: Browser location APIs may take a few seconds to respond
TIP
GeoCaptcha provides much higher accuracy than IP geolocation, with typical accuracy of 10-50 meters compared to IP-based location which can be off by several miles.